Copper weathervanes are large, heavy, and have substantial surfaces for the wind to push against.
For this reason, I can’t stress enough that it’s best to anchor the post within the roof by securing it firmly to the timbers that support the roof.
It’s best to embed half of the weathervane’s post in the roof for proper support.
Use a bracket to mount a weathervane externally only when it is impossible to embed the post.
In this case, keep the weathervane’s post as short as possible to prevent it from tilting which will prevent proper rotation.
Use stainless steel hardware whenever possible as painted steel hardware requires periodic maintenance.

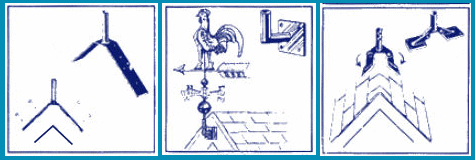
DIRECT METHOD (BEST)
1.) Bore a plumb hole into your ridge or peak the diameter of the supplied post. Most posts are 3/4" diameter. Larger vanes may require a 7/8" diameter. The thinner diameter rod portion goes up. This is the spindle for the figure.
-Half of the supplied post should go into your roof (not including the spindle) with the other half left above the roof.
-A 28″ post is 14″ in /14″ out. A 36″ post is 18″ in / 18″ out. A 48″ post is 24″ in / 24″ out.
-Install a 2×4 with a hole bored halfway through to seat the post if the depth exceeds the existing wood at the peak.
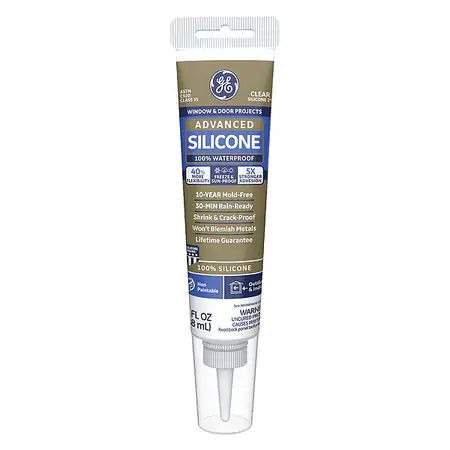
2.) Inject 100% adhesive silicone caulking into the holes.
3.) Embed the post by pushing it into the hole. Caulk around the seal. (Do not hit the spindle tip with a hammer).
4.) Assemble the weathervane onto the post. Do you need a different size post? (To Weathervane Posts)

MOUNTING WEATHERVANES ON CUPOLAS
1. Drill a 3/4″ hole in the top of the cupola, and try the weathervane post in the hole.
2. Install a pressure treated 2×4 inside the cupola with a hole bored halfway through to seat the post.
3. Install post temporarily and utilize to plumb, then remove for next step.
4. Half of the supplied post should go into your cupola. (Not counting spindle) with the other half left above the cupola (not including the spindle).
A 28″ post is 14″ in /14″ out. A 36″ post is 18″ in / 18″ out. A 48″ post is 24″ in / 24″ out.
5. Install post using 100% adhesive silicone caulking at the seat and top of the cupola.
6. Refer to weathervane assembly instructions to complete installation.
Do you need a different size post? Click here to see available (Weathervane Posts).
USING A BRACKET OR ROOF MOUNT
1.) Use a vise to bend saddle mounts to the correct pitch. Temporarily insert the post in the mount and utilize it to properly plumb. Using the mount as a template, position the mount in the desired location and drill mounting holes. Use a good quality 100% adhesive silicone caulking between the mount and roofing. Use stainless steel lag screws or bolts to secure the mount to the roof
2.) Using a sharp hacksaw and a vice, trim the weathervane post so that it extends no more than 12″ – 18″ above the mount (not including the spindle). Apply 100% adhesive silicone caulking to coat the bottom 10″ – 12″ of the post. Slide the post into the mount and wipe off the excess with a paint thinner-dampened rag. If there is a set screw, secure it now. It is best to allow the adhesive caulk to set for 24 hours before attaching the rest of the weathervane parts.
3.) Refer to assembly instructions to complete installation.
NOTE:
-
Mounting Brackets are not included with weathervanes and must be ordered separately. Click Here to view available mounting brackets
-
GE 100% adhesive silicone caulk is recommended.